Have you ever wanted to capture a video of your iPhone screen to share with someone or for your own reference? With just a few simple steps, you can easily activate the screen record feature on your iPhone and start recording anything that’s happening on your screen.
Whether you want to demonstrate a new app, create a tutorial, or save a funny moment from a game, setting up screen record on your iPhone is a breeze. So, are you ready to unlock this powerful feature and take your iPhone experience to the next level?
Let’s dive in and discover how to set up screen record on your iPhone with ease.
Check Ios Version Compatibility
To ensure that you can successfully screen record on your iPhone, it’s essential to check the compatibility of your iOS version. Before diving into the process, you need to make sure that your iPhone is running on iOS 11 or later. This is because the screen recording feature was introduced in iOS 11, so if you have an earlier version, you won’t be able to access this feature.
To check your iOS version, simply go to the Settings app on your iPhone. Scroll down and tap on ‘General’, then select ‘About’. Look for the ‘Software Version’ section, and you’ll see the version number of your iOS. If it says 11 or higher, you’re good to go!
If you find that your iOS version is older than 11, don’t worry. You can easily update your iPhone to the latest iOS version by going to Settings, tapping on ‘General’, and selecting ‘Software Update’. If an update is available, just follow the on-screen instructions to download and install it.
Access Control Center
Once you’ve ensured that your iPhone is running on iOS 11 or later, the next step is to access the Control Center. This is where you’ll find the screen recording feature that you’re looking for.
To access the Control Center, simply swipe down from the top-right corner of your iPhone’s screen. If you have an iPhone X or later, you’ll need to swipe down from the top-right corner of the screen where the battery icon is located. This will reveal the Control Center panel.
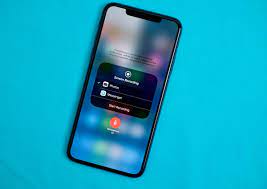
Once you’ve accessed the Control Center, you’ll notice a variety of icons and controls. Look for the screen recording icon, which looks like a solid circle surrounded by another circle. It should be located in the top-right corner of the Control Center panel. If you don’t see the screen recording icon, you may need to customize your Control Center to add it.
To customize your Control Center, go to your iPhone’s Settings app, tap on Control Center, and then tap on Customize Controls. From there, you can add the screen recording icon to your Control Center.
Now that you know how to access the Control Center and customize it if necessary, you’re ready to move on to the next step of activating the screen recording feature on your iPhone.
Customize Control Center
To personalize the Control Center, you can easily customize the icons and controls to suit your preferences. With this feature, you can ensure that the most frequently used functions are readily accessible to you.
To begin customizing, go to your iPhone’s Settings and select ‘Control Center.’ From there, tap on ‘Customize Controls.’ Here, you’ll see two sections: ‘Include’ and ‘More Controls.’
In the ‘Include’ section, you’ll find the controls that are already visible in your Control Center. To rearrange them, simply tap and hold on the three horizontal lines next to each control, then drag it to the desired position. If you want to remove a control, tap the red minus icon and it will be removed from the Control Center.
In the ‘More Controls’ section, you’ll find additional controls that you can add to your Control Center. To add a control, tap the green plus icon next to it. Once added, it will appear in the ‘Include’ section and can be rearranged or removed just like the other controls.
Add Screen Record to Control Center
To easily access the screen recording feature on your iPhone, you can add it to your Control Center. This allows you to start recording your screen with just a single tap.
To add the screen record button to your Control Center, follow these simple steps.
- First, open the Settings app on your iPhone.
- Scroll down and tap on Control Center.
- Then, tap on Customize Controls.
- You’ll see a list of available controls that you can add to your Control Center.
- Look for the Screen Recording option and tap on the green plus button next to it.
Once you have added the screen record button to your Control Center, you can easily access it by swiping down from the top right corner of your screen. This will open the Control Center.
Look for the screen record button, which looks like a white circle inside a larger circle. Simply tap on it to start recording your screen.
Start a Screen Recording
To start a screen recording on your iPhone, simply tap the Screen Record button in the Control Center. This will activate the recording feature and allow you to choose from various options such as recording the microphone audio or showing touches on the screen.
Once you’re done recording, you can easily save and share the recording with others.
Tapping the Screen Record Button
To start a screen recording on your iPhone, simply tap the screen record button. This button is located in the control center, which you can access by swiping down from the top right corner of your screen or by swiping up from the bottom of your screen, depending on the iPhone model you have.
Once you have opened the control center, you’ll see various icons and buttons. Look for the screen record button, which looks like a solid white circle surrounded by a thin white outline. Tap on it once, and you’ll see a countdown timer appear at the top of your screen. This indicates that the recording has started.
To stop the recording, you can either tap on the red status bar at the top of your screen and select ‘Stop,’ or you can return to the control center and tap the screen record button again.
It’s that simple!
Choosing Recording Options
You can customize your screen recording options on your iPhone. To start a screen recording, simply tap the screen record button in the Control Center. Once you tap the button, a recording countdown will appear, giving you a few seconds to prepare.
During this countdown, you can also choose your recording options. To do this, long press on the screen record button. A menu will pop up, allowing you to toggle on or off various options such as microphone audio, showing touches, and enabling or disabling external audio.
You can also access more detailed settings by tapping the ‘Options’ button. These options include changing the video quality, frame rate, and enabling or disabling the recording indicator. Customize your recording options to suit your needs and preferences.
Saving and Sharing Recording
You can easily save and share your screen recording on your iPhone.
After you finish recording your screen, simply tap the red status bar at the top of your screen or swipe down from the top-right corner of the screen and tap the red recording indicator.
This will bring up a notification with options to either save the recording to your Photos app or delete it. If you choose to save it, the recording will be saved as a video file in your Photos app.
From there, you can easily share it with others through various platforms such as Messages, Mail, or social media apps.
You can also edit the recording before sharing it by using the built-in editing tools in the Photos app.
Sharing your screen recordings has never been easier!
Manage and Save Screen Recordings
Now that you’ve learned how to start a screen recording on your iPhone, it’s important to know how to manage and save those recordings.
Saving your screen recordings allows you to access them later and share them with others.
Additionally, organizing your screen recordings can help you find specific recordings quickly and easily.
Saving Screen Recordings
To easily manage and save your screen recordings, follow these simple steps.
- After you have finished recording your screen, a preview of the recording will appear in the bottom left corner of your iPhone screen.
- Tap on the preview to open it in full screen.
- Once the recording is open, you’ll see options at the bottom of the screen.
- Tap on the share button, which looks like a square with an arrow pointing upwards.
- From the share menu, select the option to save the recording to your Photos app.
- The recording will be saved as a video file and you can access it anytime by opening the Photos app on your iPhone.
It’s that easy to manage and save your screen recordings!
Organizing Screen Recordings
Once you have saved your screen recordings to your Photos app, you can easily organize and manage them for quick access and retrieval.
To organize your screen recordings, open the Photos app and navigate to the ‘Albums’ tab. Scroll down until you find the ‘Media Types’ section and tap on ‘Screen Recordings.’ Here, you’ll find all your saved screen recordings in one place.
You can create new albums specifically for your screen recordings by tapping on the ‘+’ icon. This allows you to categorize and group your recordings based on your preferences.
To manage your screen recordings, you can tap on an individual recording to view and edit it. From here, you can trim the video, add filters, and make other adjustments as needed.
Troubleshooting Tips
If you encounter any issues while trying to screen record on your iPhone, there are a few troubleshooting tips that can help resolve them.
First, make sure that you have the latest version of iOS installed on your device. Sometimes, updating your software can fix any bugs or glitches that may be causing the problem.
Additionally, check if the Screen Recording feature is enabled in your Control Center. To do this, swipe down from the top right corner of your screen and look for the Screen Recording icon. If it’s not there, go to Settings, then Control Center, and add the Screen Recording option.
Another common issue is running out of storage space on your iPhone. If your device doesn’t have enough storage, it may not be able to record your screen. Delete any unnecessary files or apps to free up space.
Lastly, if none of these troubleshooting tips work, try restarting your iPhone. Sometimes a simple reboot can fix minor software issues.
Frequently Asked Questions
To check if your iPhone’s iOS version is compatible with screen recording, go to Settings, then General, and tap on Software Update. If there’s an update available, install it to ensure compatibility.
Yes, you can easily customize the Control Center on your iPhone to add the screen record option. Just go to Settings, then Control Center, and customize the options to include Screen Recording.
Yes, it is possible to start a screen recording without accessing the control center. Simply go to Settings, Control Center, Customize Controls, and add the Screen Recording option. Then you can easily start recording.
Conclusion
In conclusion, setting up screen record on your iPhone is a simple process that can be done through the Control Center. By customizing the Control Center and adding the Screen Record option, you can easily start and manage screen recordings on your device.
Make sure to check your iOS version compatibility and follow the troubleshooting tips if you encounter any issues. With these steps, you’ll be able to easily activate screen record on your iPhone.


